The Reporting of Actions (ROA) section of the Attachment Warehouse is used to submit documents to state insurance departments, pursuant to the Producer Licensing Model Act (PLMA) Section 17 or other similar statutory language regarding the duty and obligation of the producer for the reporting of actions.
Submission date details
When you need to report an action to the states, each state has different requirements for how long you have to report the action. For example, most states require that you report the action within 30 days of the incident, but your state may have a different deadline.
When you upload a document to the ROA, the upload date is automatically used as your report date.
Check with the State to verify that you will meet the deadline.
Note: If you will miss your state’s deadline, still upload your documents to the ROA. The State will contact you for any further actions you need to take.
Things to know
Before you begin
- You must already have a license to submit documents to the ROA section of the Attachment Warehouse.
Gather the following applicable information: Note: If you are a business entity and have resident licenses in more than one state, you’ll need to select one as your home or resident state. Use your FEIN and firm name as it is listed in the Producer Database or application if this is the first time you are using the Attachment Warehouse.
Step 1: Log in
Log in to the Attachment Warehouse.
Step 2: Verify producer contact details
- Verify Producer contact details:
- If this is your first time using the Attachment Warehouse:
- Click Edit.
- Enter your business phone number and email address.
- Click Update.
- Click Continue.
- If the producer information shown is correct, click Continue.
The Document submission page opens. Any previously uploaded documents are shown. - Click Add New Reporting Action.
The Individual Producer Attachment screen opens. - If prompted, read and accept the Individual Producer agreement.
The Producer/Authorized Submitter screen appears. - Select one of the following:
- If you are attaching documents for yourself or your business, select Producer.
- If you are submitting documents on behalf of somebody else, select Producer’s Authorized Submitter and complete the form that appears.
- Click Continue.
The Upload New Document screen opens.
Step 3: Upload documents
Upload new documents to a new reporting action
- Select the Category of Action.
Tip: See the descriptions at the top of the screen in the Attachment Warehouse for descriptions of each category.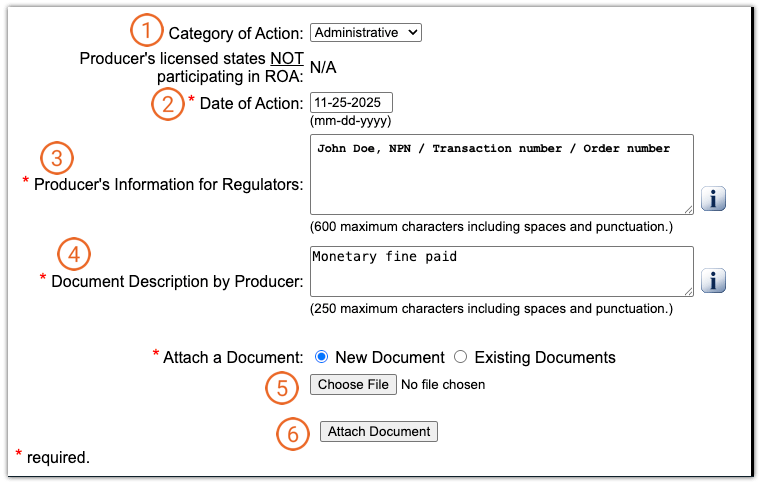
- Enter the original date of the issue or incident.
Note: The Date of Action is different than your report date. When you upload a document to the ROA, the upload date is automatically used as your report date. - In Producer’s Information for Regulators, enter information for regulators to review.
- In Document Description by Producer, enter a description of what the document is.
Tip: This can be a reiteration of the Producer’s Information for Regulators or your NPN number, if you have one. - Click Choose File.
A file browser opens.
Note: If you already have documents uploaded to the ROA, you will see an option to select Existing Documents. For more information about how to use this option, see "Attach previously uploaded documents to a new ROA" below. - Navigate to a file you want to upload and click Open.
The file browser closes and returns you back to the Upload New Document screen.
Note: You can only upload one document at a time. See step 8 for how to upload multiple documents. - Click Attach Document.
You are shown the documents you’ve uploaded so far.
Important: Verify that you are uploading the correct document in the correct section of the warehouse. Once you upload a document to the Attachment Warehouse, it cannot be deleted without NIPR assistance and State approval, and it might not be able to be deleted at all. - (Optional) To upload more documents to this ROA, locate the ROA in the list, click the green plus icon to Attach Document for that row, and repeat the steps above.
Note: Upload all documents for this ROA in the same session. - When you’re done uploading documents, click Continue-View Summary.
The Initial Summary page opens with a confirmation message. - Click Return.
The Main Menu page opens. You will receive an email confirming the change. You can then use the link in the email to sign in and view details.
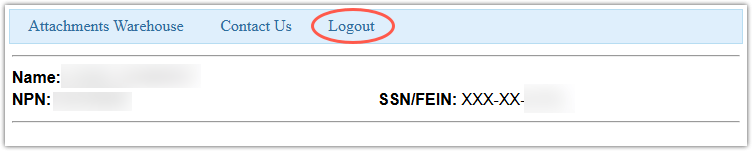
Tip: You can check the status of your application at any time. It may take a few days for the State to review your documentation. - Click Logout.
Attach previously uploaded documents to a new ROA
- Select the Category of Action.
Tip: See the descriptions at the top of the screen in the Attachment Warehouse for descriptions of each category. - Enter the original date of the issue or incident.
Note: The Date of Action is different than your report date. When you upload a document to the ROA, the upload date is automatically used as your report date. - In Producer’s Information for Regulators, enter information for regulators to review.
- In Document Description by Producer, enter a description of what the document is.
Tip: This can be a reiteration of the Producer’s Information for Regulators or your NPN number, if you have one. - Select Existing Documents.
A menu of existing documents appears.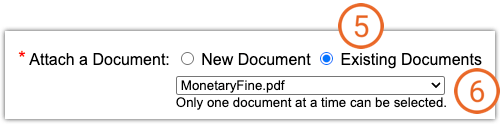
- Select the document you want to attach.
- Click Attach Document.
You are shown the documents you have uploaded so far. - (Optional) To attach more documents for this ROA, click Attach Document and repeat the steps above.
- Click Continue-View Summary.
The Initial Summary page opens with a confirmation message. - Click Return.
The Main Menu page opens. You will receive an email confirming the change. You can then use the link in the email to sign in and view details.
Tip: You can check the status of your application at any time. It may take a few days for the State to review your documentation. - Click Logout.
Add new documents to an existing ROA
After logging in, your previously uploaded documents and ROAs are listed.
- In the table, locate the ROA you want to add documents to.
- In the same row as the ROA, click the green plus icon to Attach Document.
- Select one of the following:
- If you are attaching documents for yourself or your business, select Producer.
- If you are submitting documents on behalf of somebody else, select Producer’s Authorized Submitter and complete the form that appears.
- Click Continue.
The information you entered previously for that ROA appears. - In Document Description by Producer, enter a description of what the document is.
Tip: This can be a reiteration of the Producer’s Information for Regulators or your NPN number, if you have one. - Click Choose File.
A file browser opens. - Navigate to a file you want to upload and click Open.
The file browser closes and returns you back to the ROA details screen.
Note: You can only upload one document at a time. See step 9 for how to upload multiple documents. - Click Attach Document.
A screen appears showing you the documents you’ve uploaded so far.
Important: Verify that you are uploading the correct document in the correct section of the warehouse. Once you upload a document to the Attachment Warehouse, it cannot be deleted without NIPR assistance and State approval, and it might not be able to be deleted at all. - (Optional) To upload more documents to this ROA, locate the ROA in the list, click the green plus icon to Attach Document for that row, and repeat the steps above.
Note: Upload all documents for this ROA in the same session. - When you’re done uploading documents, click Continue-View Summary.
The Initial Summary page opens with a confirmation message. - Click Return.
The Main Menu page opens. You will receive an email confirming the change. You can then use the link in the email to sign in and view details.
Tip: You can check the status of your application at any time. It may take a few days for the State to review your documentation. - Click Logout.